I have the opportunity to create a virtual tour of a new listing and I want to learn how to use Autopano Pro. So far it’s very simple. I’ve taken my photos by holding the camera because of a lack of time. Daylight is fading fast and so is my battery life. I stand with my camera as close to my body as possible and still able to see through the lens. I’m also guessing at the 2/3’s rule for each photo’s overlapping. Lastly, from past experience I have learned to make a simple photo that helps me differentiate between each room. I always take a picture of my feet before going to the next room.
Using Autopano seems simple. After uploading my photos to a folder on my laptop I open Autopan Pro. I’m able to choose the first few photos which were of the living room as I stood in the foyer and photos of the foyer as I stood in the living room. Thankfully the house is vacant.

When taking the photos I find it’s easier to blend them together and still have part of the ceiling and part of the floor if I hold the camera at a 90 degree angle. Portrait, not landscape. This causes the pictures to need to be rotated when you begin to work with them. But with Autopano it’s able to stitch the correct photos together and it left them in portrait mode. And it allows you to upload all the photos you have taken (including the ones of my feet) and it sorts through and creates multiple panoramic shots.
Although it’s not intuitive I discover the next step is to double-click on the panoramic photo. It’s turned portrait so I use the icon that turns it 90 degrees counterclockwise and the photo looks great. There are other icons to correct the color, the type of projection, the vertical and center and more. Even the Yaw Pitch Roll. When you choose that icon you are able to give each a number and it applies the changes to your panoramic photo. That is something you can lose a lot of time in tweaking.
I click Save, Render and Export to PanoTools for each of the panos because I really don’t know what I need and I don’t want to have to recreate anything. I’ll just save everything to CD later and put it in a drawer to save disk space.
In the kitchen the pantry door is out of alignment. 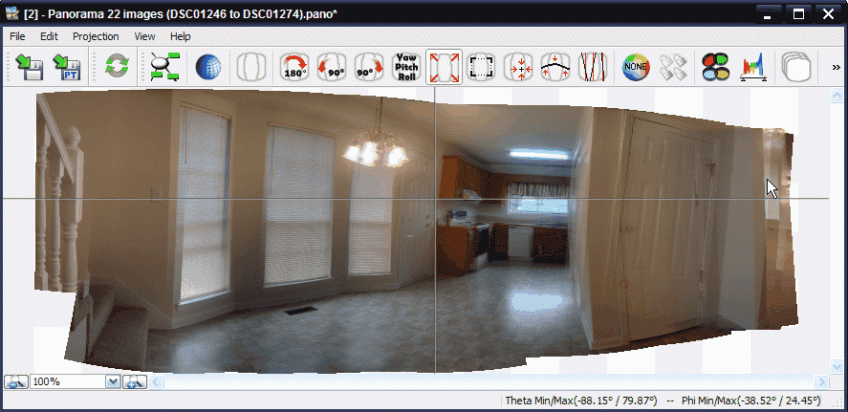
I’m sure I can use the control points icon to create points on each picture and force it to line up. But even though I’ve created the pano photo and turned it 90 degrees counterclockwise, the control points use the original photos that have not been rotated. It would be easier if they had been rotated. But you are able to change the scale to fit the entire photo in the screen and this helps. I try adding control points but it doesn’t appear to be working. I use the mouse to draw a square around a corner near the pantry door in picture one and then another square of similar size the same place in picture two. Then I click on the add control points icon. Nothing appears to happen. I do it again, several times, in different areas. Control points do not appear to be added. On another pano, the bathroom, I’m able to add control points on door corners, vent corners and the towel holder and delete pictures. But then I don’t see what I need to click on to save my changes. Apparently just Xing out saves it and my pano looks much better.

Overall, I’m very impressed with AutoPano and I will definitely keep using it. It was amazingly accurate on creating the panos, easy to correct lighting, color and angle. It needs more documentation on using some of the features but that’s really the only con.
Now on to creating the floorplan and website.


